Movie nights and offices don’t typically go hand in hand. Yes, we know the office is a place of serious business. However, finding time for office fun, laughter, and team bonding is essential. While including this necessary escape for your team into the regular schedule can be very challenging, one of the best ways to create team bonding time without awkwardness is through office movie nights.
But while we celebrate the movie night with tasty popcorn treats, we must remember the mess that can follow if we are not conscious about keeping a clean and organized workspace. This short guide will show you how to enjoy office movie nights and keep your office clean simultaneously.

The first step in this foolproof plan will be to map out the movie area to contain any mess that can potentially arise from all that snacking. Your designated movie area should naturally be spacious and have a focal point where the display screen will be located. This particular zone would absorb the aftermath of any eating and snacking mess, so you don’t have to worry about other office areas. The most common choice is the office conference room.
We recommend only clean and easy-to-manage snacks for your movie nights. These snacks are typically called 'office-friendly movie snacks,' and there are quite a number of them. There is the compulsory popcorn, of course, so you can stick with this option. However, you can go out of your way to select any kind of snack that does not have the potential to leave a trail of sticky residue or crumbs in its path. More points if they are healthy too. So we’re talking granola bars, stuff that comes in their own boxes like doughnuts and pizzas, a fruit platter or trail mix, and maybe mini sandwiches. You get the general idea.
As our guide train chugs in slowly toward the cleaning part of this journey, the next tip is to provide a box or table stacked completely with cleaning materials. These movie night cleaning stations will contain all the necessary supplies for cleaning up any stains or spills. These should include wipes, paper towels, and trash bags to help clean and subtly remind your colleagues that they have to keep their makeshift theatre neat and organized. After all, the “theatre” would most likely host some crucial business meetings by the next day.
We are not particularly recommending a buffet here as they tend to take the focus from the screen to the food. We suggest a carefully arranged table that will serve as the point of snack distribution. These “snack stations” should be in a central area to minimize spreading crumbs and spills around the theatre. Team members can simply move to this area to get treats and then return to their seats, or they can get some bites at the table and still enjoy the movie from their vantage point.

Cleaning up after the movie night should be collaborative to increase speed. And we have tips to make it even faster:
You were probably shocked when Ironman died in Avengers: Endgame and must’ve spilled some of your popcorn. Well, don’t expect your team’s reaction to be any different. But remember, this is no real theatre. It’s your company conference room that you’ll need to use the next day. So, as much as possible, ensure popcorn spills are handled ASAP.
Start by picking up and trashing the spilled popcorn and then blot the affected area with a microfiber cleaning cloth immediately to ensure the butter does not seep into surfaces, which ultimately multiplies the cleaning task. To avoid finding stray kernels in your client’s chair the next day, you must also ensure that the makeshift theatre space is swept and vacuumed immediately after the movie.
The number one way to keep snack crumbs from developing wings and flying everywhere is to have crumb trays or mats. You’ll place each person’s snacks in crumb trays to trap any crumbs that might fall while they’re watching the movies.
The crumb mats go on the floor to ensure that the crumbs that escape the trays do not gain freedom beyond a specific area. The mats also make cleanup easier as all you have to do is roll them up to gather any spills. And, of course, vacuuming at the end will get rid of anything you miss.
It can be tricky business to address beverage spills, but here are two basic ways to start right;
This point has been addressed in part before, but we will reiterate it to show the importance of providing movie night cleanup supplies. Cleaning supplies such as disinfecting wipes, gloves, microfiber clothes, dishwashers, paper towels, brooms, dustpans, and trash bags must be readily available in the cleaning station or office broom cupboard. These supplies will aid the cleaning process and ensure that team members can contribute to the collective cleaning immediately (no excuses given).
The joy of watching movies in the same spot where you had your most challenging presentation to a huge client is an experience that is as much fun as the movies you have just seen. By following this guide, you can keep the lasting experience of office cinematic night fun while retaining the characteristic tidiness and ambiance that your office space is known for.
So grab your popcorn, pick an amazing movie, and enjoy this team bonding activity.
Clean Tu Casa is the team to call for any cleaning service in Atlanta. We offer Atlanta residential cleaning services and corporate cleaning services. We provide commercial cleaning services in Marietta, Buckhead, and Brookhaven areas. Whether you want a one-time, weekly, bi-weekly, or monthly cleaning, simply reach out to us for your free quote today.
Ahhh, there's nothing quite like snuggling up in a cozy bed with fresh, clean sheets. But when the time for organizing comes, one of the most challenging tasks is figuring out how to store sheets. Where do you keep all those extra sheets and bedding sets when you're not using them? If you're tired of tripping over piles of linens, we’ve got you! Here are some fantastic bedding storage ideas and tips to keep your sheets organized and easily accessible.
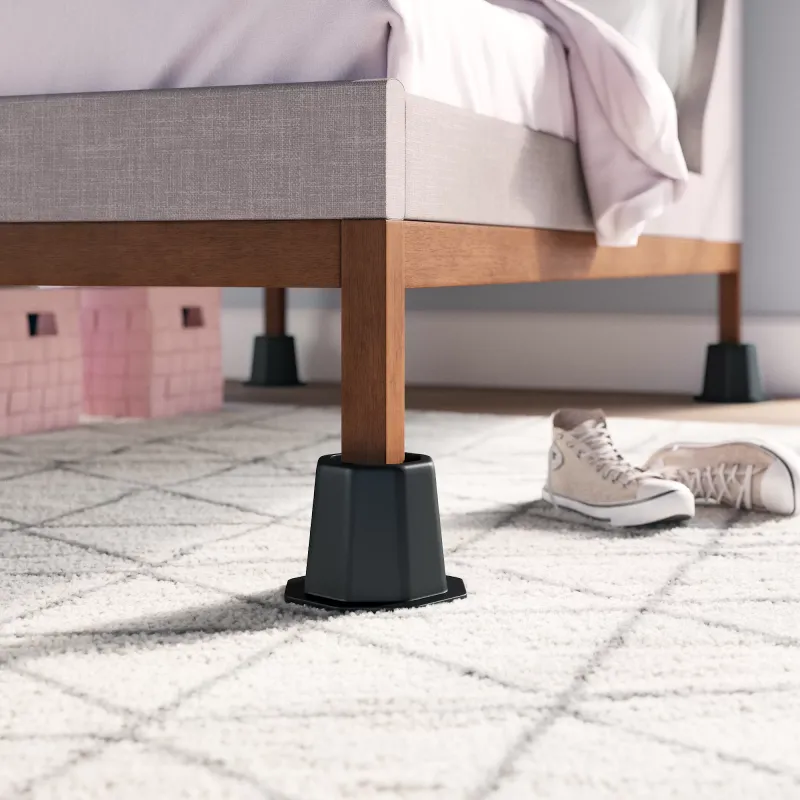
Who knew your bed could be so versatile? Bed raises are small devices that fit under the legs of your bed frame and lift the bed a few inches off the ground. They are a terrific way to create extra space under your bed, perfect for stowing away those additional sheet sets, blankets, and pillows in boxes, baskets, or bags. You'll sleep better knowing that all your bedding essentials are right at your fingertips.

If you've already got a lot of under-bed space, there are plenty of ways to maximize storage there. Simply slide some plastic storage bins or boxes under your bed, and voila! You have a ton of extra space to stash your sheets and bedding. You should use containers or boxes with wheels to protect your floors and make retrieving your sheets much more effortless. Bonus points for keeping everything organized with labeled bins.

Not only do bed storage benches add some serious style to your bedroom, but they also provide an excellent solution for storing bedding. Simply lift the lid to reveal hidden storage space, perfect for all your extra sheets and blankets. And as a bonus, you'll have a cozy spot to sit and put on your shoes in the morning. Bed storage benches come in various styles and materials, so you can choose one that matches your decor.
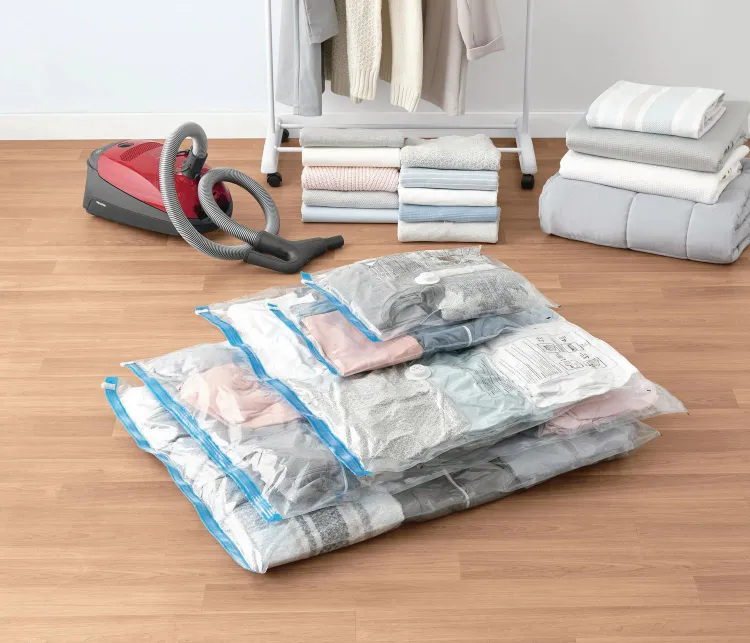
Vacuum-sealed bags are a great option if you're storing sheets for a short time, like when moving or renovating your home. These bags remove all the air from the contents, which helps to protect your sheets from moisture and dust. Simply stuff your sheets and bedding into the bags, suck out the air, and voila! You have a compact bundle that can be used as a temporary pillow or tucked away in a closet. However, remember that vacuum-sealed bags are not the best option for long-term storage, as they can compress the fibers in your sheets.

Sometimes, the classics are classics for a reason. The tried-and-true linen closet is a fantastic option for storing all your sheets and bedding. Keep everything organized and tidy with labeled shelves and dividers, and you'll never have to hunt for a matching sheet set again. Consider adding scented sachets or cedar blocks to keep your linens smelling fresh.
Now that we’ve helped you solve the problem of “where to store sheets,” let's talk about some tips for properly storing them:

When storing sheets, it's essential to use the proper folding techniques to keep them tidy. Here are some easy sheet-folding methods you can try:
It doesn’t get any easier than this. Simply lay the sheet flat on a surface and fold it in half lengthwise. Then fold it in half again and in half one more time to create a neat rectangle.
Instead of folding your sheets into a square, roll them into a tight cylinder shape. This technique saves space and adds a playful touch to your linen closet.

Use the KonMari method to fold your sheets into a beautiful origami-inspired shape. If you're familiar with this folding method, you know it's all about organizing and decluttering your home. All your items, from underwear to bed sheets, can be folded adequately into space-conserving sizes with this method. You can check out this comprehensive post by ‘A to Zen Life’ on everything related to KonMari.
Storing sheets doesn't have to be a headache. With these fun and practical bedding storage ideas, tips for proper linen storage, and ways to fold your sheets, you'll be able to keep your bedding organized and easily accessible. So go ahead and invest in some bed raises or a storage bench, pull out those labeled plastic bins, and start folding your sheets with precision. You'll sleep better knowing that your bedding is neat, tidy, and ready to use at a moment's notice.
Clean Tu Casa is the team to call for any cleaning service in Atlanta. We offer Atlanta residential cleaning services and corporate cleaning services. We provide commercial cleaning services in Marietta, Buckhead, and Brookhaven areas. Whether you want a one-time, weekly, bi-weekly, or monthly cleaning, simply reach out to us for your free quote today.
If you’re wondering how to clean a griddle pan, that means you’ve finally realized the amazing versatility these utensils offer. Griddle pans are one of those kitchen tools that just make sense. Thanks to the smooth surface and low sides, this culinary tool is great for making sandwiches, pancakes, and seared steak. And because of their large sizes, they are great time savers, allowing you to cook multiple meals at once.
Before we get into how to clean a griddle pan, let us first point out that a griddle pan and a grill pan aren’t the same thing. Where griddle pans are flat, grill pans come with ridges to mimic the pattern meat gets when cooked on an outdoor grill. Although a lot of griddle pans are reversible with one flat side and one ridged side.
Related: How to Clean Cast Iron Cookware
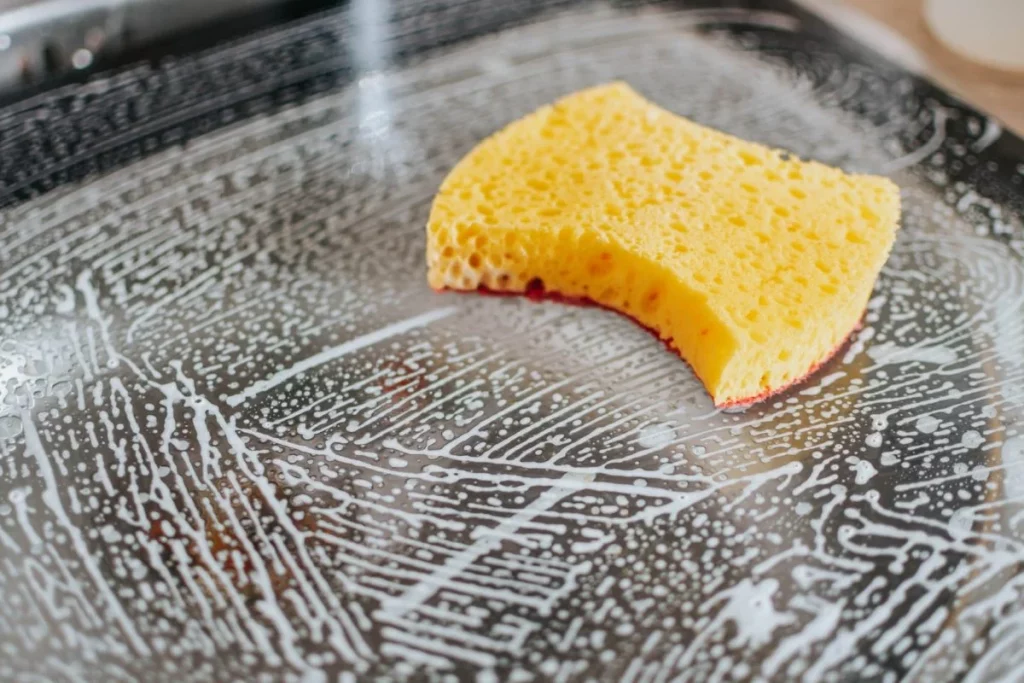
One quick and effective method to use for your post-cooking cleaning is the scrape-and-wipe technique. From the name, it is a process where you scrap and wipe griddle pans after usage. However, it's a bit more than that. Here's how it's done:
If it has been a while since you cleaned your griddle pan, these steps listed above won’t cut it. You’ll need a bit more effort to remove grease from griddle pans.
You’d need to make a 50/50 solution of white vinegar and water in a spray bottle and apply it to your hot griddle pan. Using vinegar for griddle cleaning is very effective due to how easily the acid cuts through grease.
There are some common issues that griddle pan owners experience, and here are a few tips on how to fix them.
And that's it. With the proper care, your griddle pan can keep being the durable and versatile kitchen tool it was made to be.
Clean Tu Casa is the team to call for any cleaning service in Atlanta. We offer Atlanta residential cleaning services and corporate cleaning services. We provide commercial cleaning services in Marietta, Buckhead, and Brookhaven areas. Whether you want a one-time, weekly, bi-weekly, or monthly cleaning, simply reach out to us for your free quote today.
When you list the appliances you use in winter or fall, your fans and ACs will likely not make that list. But using and cleaning your ceiling fan in those months isn’t as far-fetched as you might think. Your ceiling fan could even help reduce your energy bill and circulate warm air around your home if you know the right things to do.
And telling you exactly how to do that is where we come in. Read on to know how best to use your ceiling fans in cold months and ways to clean them.

Most fans have a feature that changes the direction the blades are spinning, although many people need to be aware of this feature. In colder months, your blades should be turning in a clockwise direction. According to EnergyStar, this creates an updraft that forces warm air near the ceiling down to the space below.
A lower rotation speed will help circulate the warm air more effectively than a higher speed.
You can set your thermostat a few degrees cooler when using your ceiling fan to circulate warm air in a space. This is because your fan and thermostat can work together to ensure your area is warm even with your heating set at a lower temperature. This hack can help you save some dollars on your energy bill for those months.
This is one tip for every time of the year, but mainly for the cold months. Because most people hardly turn on their fans in these cold months, winter dust typically collects on the blades. Cleaning your ceiling fan before using it helps to protect you from dust and mites that fly around when the blades start rotating. And if you’re wondering how to clean your ceiling fan, just keep reading.
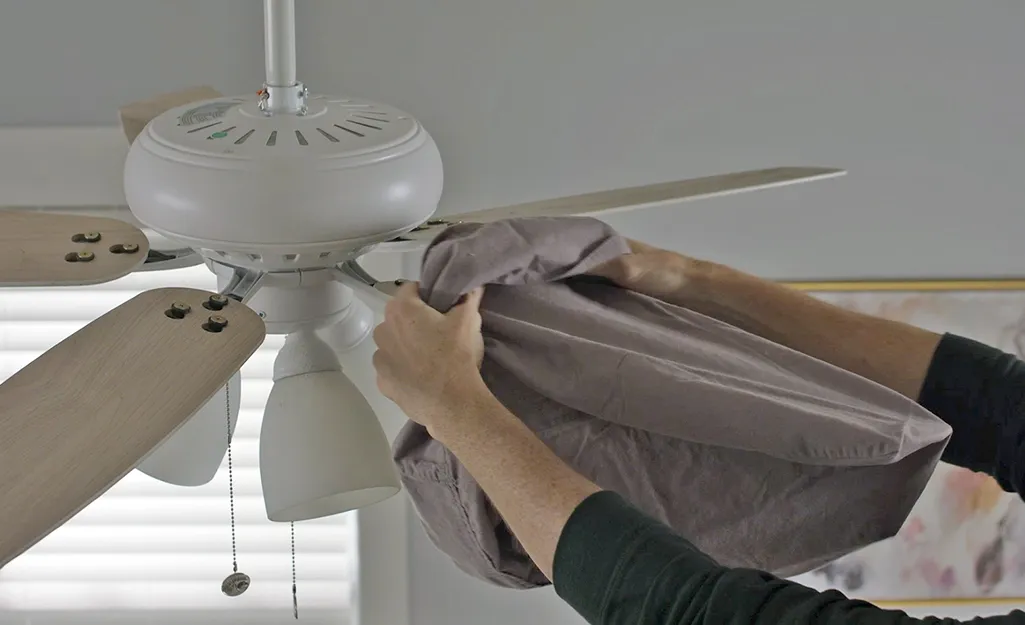
Cleaning fans can be challenging, especially cleaning fans without getting dust everywhere. This simple cleaning method is just what you need to get it done.
PS: To avoid dust build-up on the ceiling fan after cleaning, you can use a dust-repelling spray or make your simple DIY version at home.
Your ceiling fan shouldn’t be abandoned throughout the cold months. Cleaning your ceiling fan and using it the right way would help you maximize it all year round. And if you’re ever in need of a thorough house cleaning in Metro Atlanta, we are the ones to call.
Clean Tu Casa is the team to call for any cleaning service in Atlanta. We offer Atlanta residential cleaning services and corporate cleaning services. We provide professional cleaning services in Marietta, Buckhead, and Brookhaven areas. Whether you want a one-time, weekly, bi-weekly, or monthly cleaning, simply reach out to us for your free quote today.
We often get so caught up in our routines that we forget some critical chores necessary to maintain a safe home. One of the essential home safety tasks we tend to overlook is dryer vent cleaning.
Dirty and clogged dryer vents often harbor harmful microorganisms and provide a haven for unwanted animals, including skunks, mice, and even snakes – and these are not the domesticated, adorable types! Above all, a clogged vent is one of the highest causes of fires in the home.
This guide will walk you through the reasons why neglecting your dryer vent can lead to potential hazards and how a simple cleaning routine can mitigate these risks.
Related: How to Tackle Cat Hair in Your Air Vents

Understanding the scope of the problem is the first step toward safeguarding your home. Let us provide some interesting figures on the damage caused by home dryer fires.
According to the National Fire Protection Association (NFPA), between 2014 and 2018, the United States Fire Departments responded to about 13,820 home fires involving dryer vents. These fires cost over $233 million in direct property damage annually.
Amazingly, one-third of these fires (27%) were caused by a failure to clean. If too much lint builds up, the hot air from the dryer can quickly ignite the dry fabric particles, which is the recipe for a fire disaster.
These mind-boggling dryer fire statistics emphasize the clear link between clean dryer vents and safety from fires, injuries, and millions in property damage.
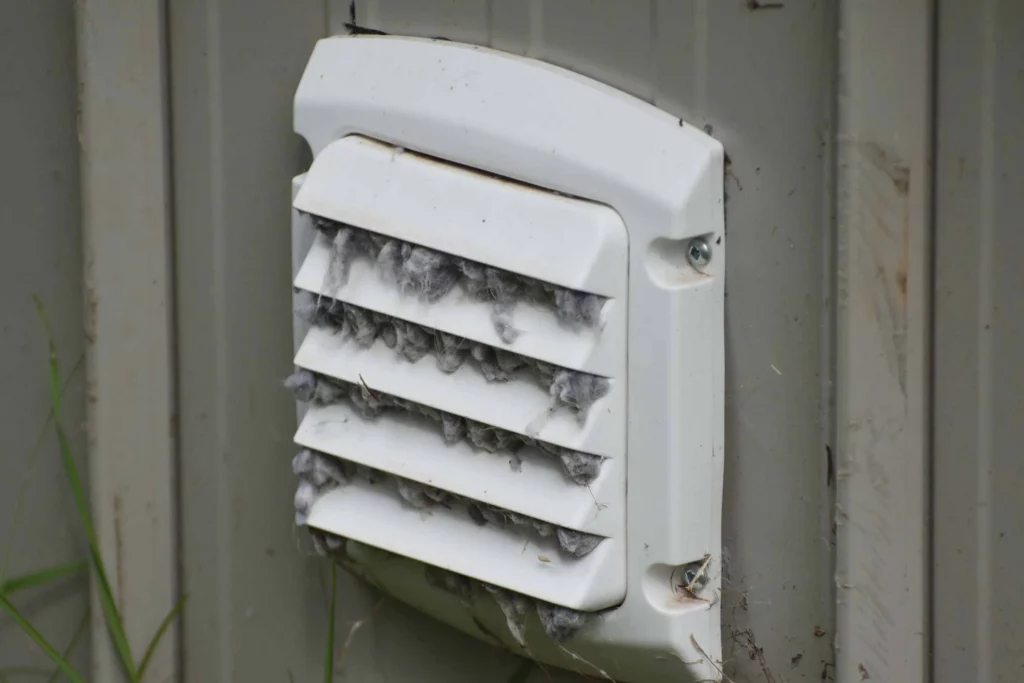
To avoid these disasters, here are ways to recognize that your vent is due for cleaning;
One of the earliest signs of potential vent blockages is that it takes longer than the regular 45-minute cycle to complete the drying process. Extended drying times often indicate that your dryer vents have become clogged and should invariably be attended to.
An overheated dryer exterior points to possible poor ventilation in the dryers. Whenever you detect that your dryer is overheated, you should act immediately, as any delay could lead to severe consequences. Develop a routine of regularly checking for overheating and cleaning the vent immediately after the heating becomes obvious. If it persists, you can book a maintenance check to ensure the blower and heating element work correctly.
There is nowhere a burning smell is a good sign, and your dryer is no different. The burning smell often warns of lint or debris near the heating elements. Addressing the issue once the burning smell is detected can (and will!) make a huge difference.
Lint buildup in and around the dryer area is as clear a sign as can be that your vent system is clogged and requires your attention. It is essential to develop the habit of regularly inspecting the dryer for lint particles around the trap and vent. If you notice this lint accumulation, the proactive thing is to clean out as much of it as possible.
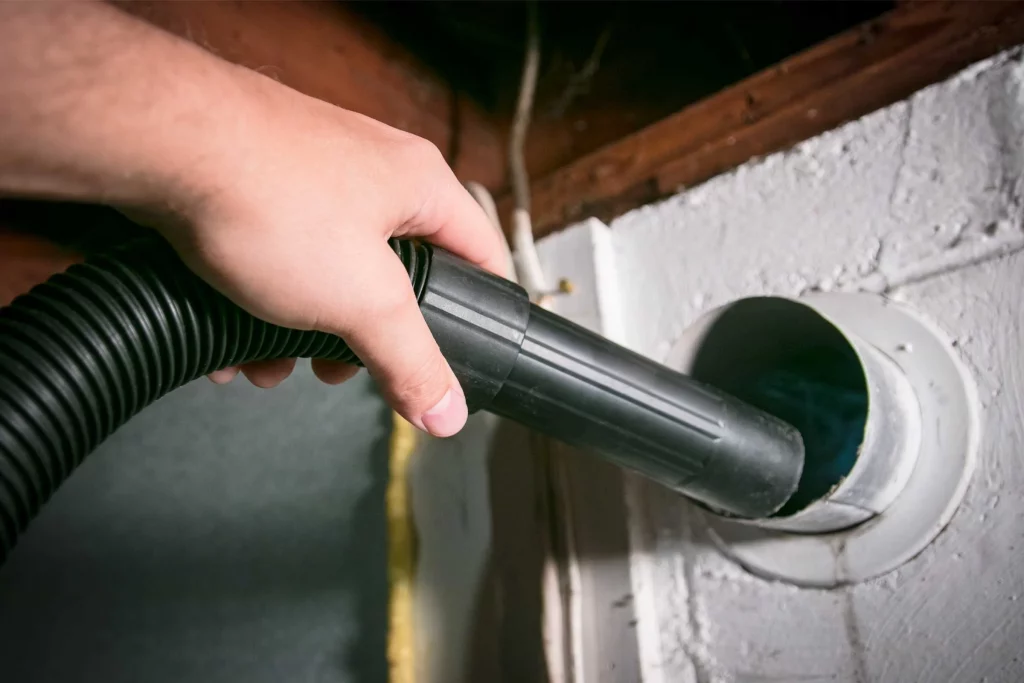
Your first step is to turn the dryer safety switch off. You must turn the dryer switch off and unplug it before cleaning. This will prevent any electrical mishaps and offer you a secure environment to complete your cleaning.
The next thing to do is to carefully locate and remove the dryer vent hose from the back of the appliance. This step is necessary to access the vent and facilitate effective cleaning fully. When you remove the hose, look around the connection point and clean any visible lint or debris. That area is typically forgotten during cleaning.
Using a dryer vent pipe brush, dishwashing liquid, a microfiber rag, and some water, remove any lint and dust particles that may have accumulated over time, paying attention to the bends and curves in the vent system.
After every cleaning round, you must inspect the vent outlet to ensure it is free from obstructions. Clean the area around the vent outlet, removing any accumulated lint. This will also improve airflow and reduce the risk of overheating.
You may have to use a vacuum with a specialized vent brush attached to deep-clean dryer vents. This combination effectively removes hidden lint or debris that may not have been accessible through standard cleaning methods. Deep cleaning is vital in removing the clogs that are harder to reach but will still pose a fire threat.
To maintain your vent systems' optimal safety and efficiency, you must establish a regular dryer vent cleaning routine. Regular cleaning, at least once a month, will do you a world of good, and you can clean out the lint before it begins to build up.
However, your cleaning frequency can be affected by several important factors. Dryer vent cleaning frequency may be affected by the vent's length, the dryer usage frequency, and the type of clothing being serviced. For example, clothing items made of fleece and flannel are likelier to have more lint than others. Considering these variables is essential when deciding on your dryer vent cleaning frequency.
In conclusion, by following the outlined steps for cleaning and caring for your dryer vent, you enhance appliance efficiency and mitigate the risk of potentially catastrophic fires. Stay proactive, make dryer vent care a routine, and ensure a safer home for you and your loved ones.
Clean Tu Casa is the team to call for any cleaning service in Atlanta. We offer Atlanta residential cleaning services and corporate cleaning services. We provide commercial cleaning services in Marietta, Buckhead, and Brookhaven areas. Whether you want a one-time, weekly, bi-weekly, or monthly cleaning, simply reach out to us for your free quote today.
For some intriguing reason, cast iron cookware is making a comeback, and sincerely, we are all for it. Some people might just be catching on to the cast iron train, but for some others, you’ve been here for a while. But wherever you are in your experience with this timeless material, you would still love this guide on how to clean cast iron cookware.
Cast iron cookware has been used since the 5th century B.C. and only declined when cheaper aluminum cookware became more prevalent. If this material has survived millennia to still be of use in our lives, there are bound to be some benefits of cast iron that just can’t be replaced. Join us to learn more about this material and how to clean it.
Many claim cast iron cookware care is very involving and stressful, yet these utensils are becoming more commonplace in kitchens. This is because the extra care needed for the material is worth it when compared to the benefits, which include:
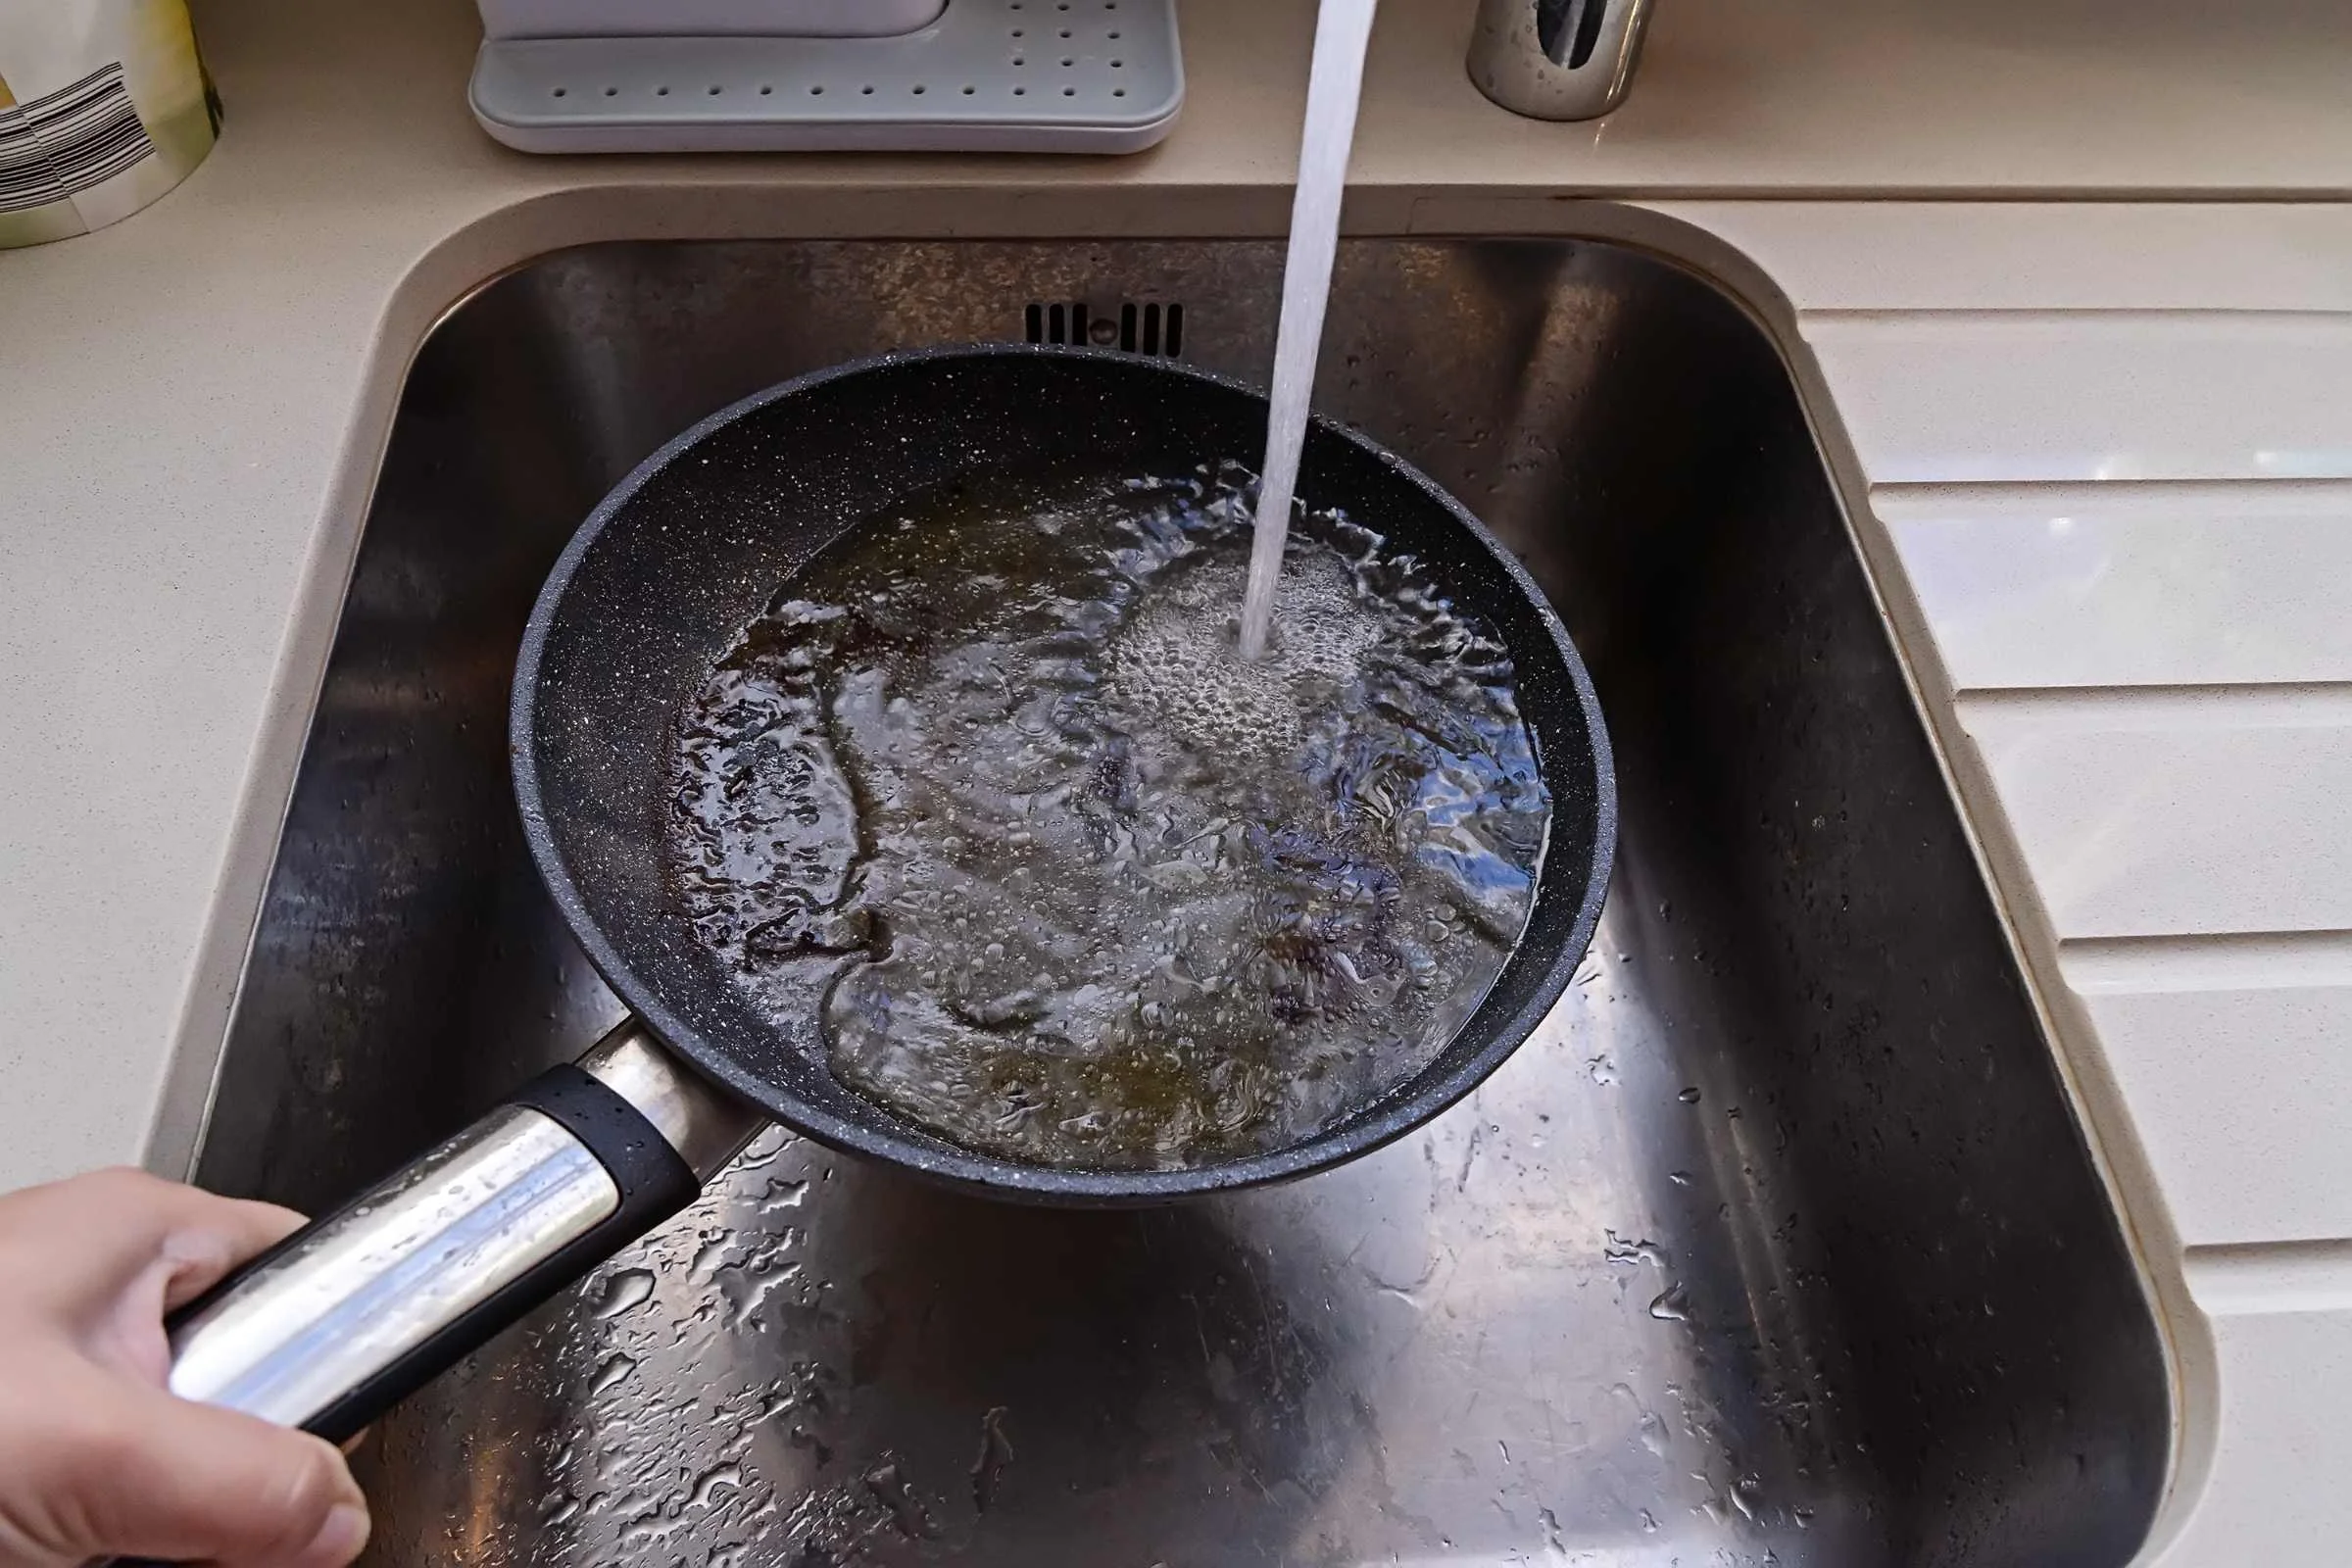
Cast iron maintenance isn’t difficult. It only requires a different technique than cleaning other materials. Your stainless steel pan can be easily washed with soap and even steel wool, but you’d need other methods for this material.
As you use your cast iron pan, the food grease will build up and get polymerized, producing a dark patina that coats the surface of your cookware. This is called cast iron seasoning. Don’t worry, it’s a good thing.
This seasoning gives your cookware a non-stick coating so you can fry or sear steak without worries. It occurs naturally, but you can also speed the process along. Here’s how to do it:
There’s this saying that soap and cast iron cookware don’t mix, as soap can strip the seasoning. Now, that isn't true. Cast iron seasoning is made of polymerized oil that can’t be harmed by modern dish soap. However, avoid oven cleaners made with lye or sodium hydroxide, as they can damage the seasoning and even the iron.
Note that seasoning builds up over time. So, while soap isn't harmful to your old pots, that brand-new one would be fine without it.
No one wants to see rust on their cookware. This is why drying cast iron utensils before storing them properly is necessary. You can put your cookware on the stovetop or oven over low heat to dry it after cleaning. Afterward, keep it away from moisture.
The trick to cast iron maintenance is daily cleaning. Fortunately, it is an ongoing process that is not so difficult to perform. You only have to scrape and wipe cast iron cookware to get the best out of it. Here’s how it’s done:
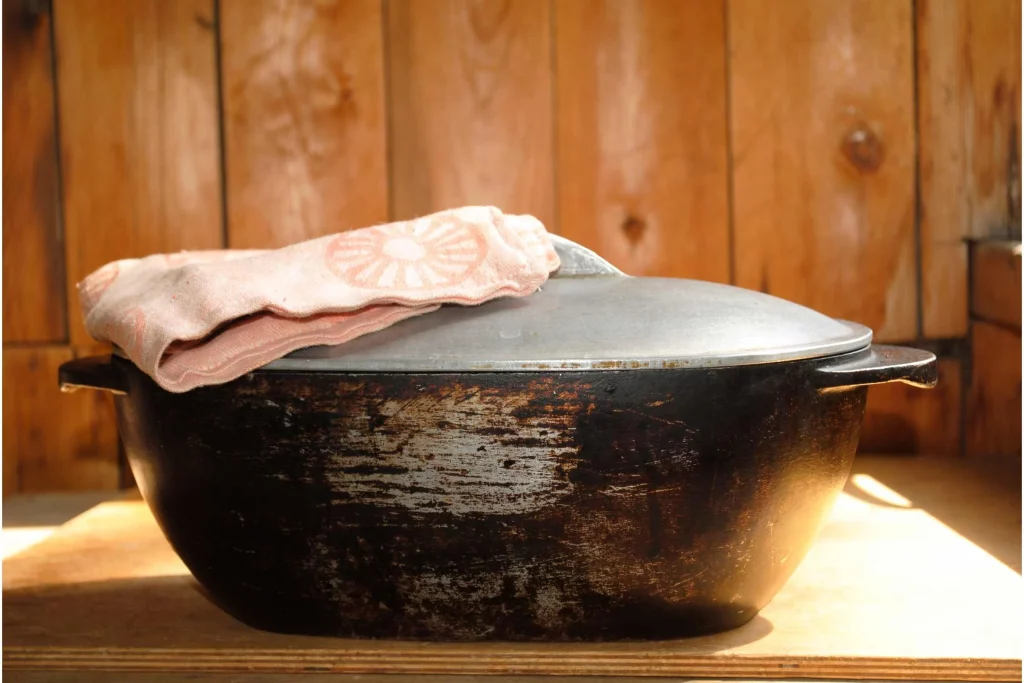
You may encounter a few issues when using your cast iron cookware. We’ll try to tackle the common ones here.
Cast iron cookware is on the rise again thanks to its numerous benefits, including non-stick seasoning, durability, and versatility. And with the guide above, you can be assured that yours will last long enough for you to enjoy all these benefits.
Clean Tu Casa is the team to call for any cleaning service in Atlanta. We offer Atlanta residential cleaning services and corporate cleaning services. We provide commercial cleaning services in Marietta, Buckhead, and Brookhaven areas. Whether you want a one-time, weekly, bi-weekly, or monthly cleaning, simply reach out to us for your free quote today.
Happy New Year! It’s our first blog of the year, and what better way to start than with office cleaning resolutions? As we step into the promising days of 2024, it's time to redefine our workspace habits. In this guide, we'll explore the transformative power of a cleaner office culture and how it sets the tone for unparalleled success in the year ahead.
In the bustling world of business, a clean workspace is more than just a visual treat; it's a catalyst for enhanced well-being and heightened productivity among employees. Therefore the connection between a clean office and a prosperous year ahead is not mere coincidence; it's a strategic choice that paves the way for unprecedented success.
Join us as we explore actionable steps and strategies to transform your workspace into a hub of inspiration and achievement in 2024.
The first step to any clean space is decluttering. Sometimes, an office isn’t actually dirty. There are just tons of unfiled documents and knick-knacks lying around, so it looks like a bomb went off in there. This year, make a deliberate effort to keep your team’s office space clean with practical steps like:
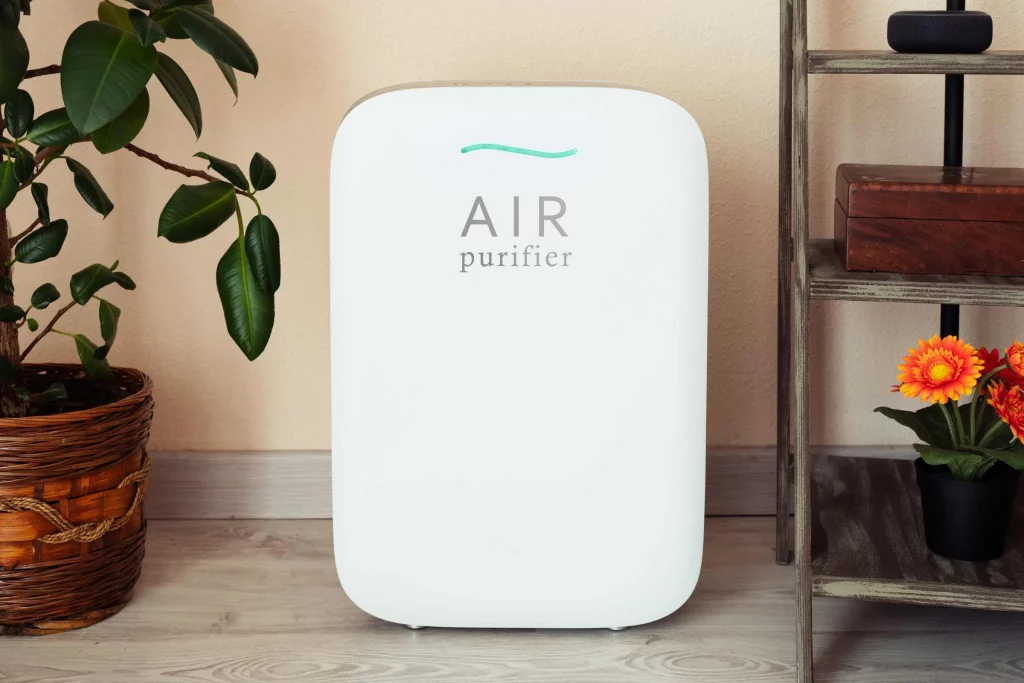
Proper air quality and ventilation aren’t just one of the many issues cleaning companies bring up to take your money. It’s necessary to prevent the circulation of allergens and pollutants and to enhance productivity. Here are steps to take this year to improve the air in your commercial space:
The environment is everyone’s responsibility, and this year, “it’s not enough to ‘try to try.’” Your company can play its own part by:


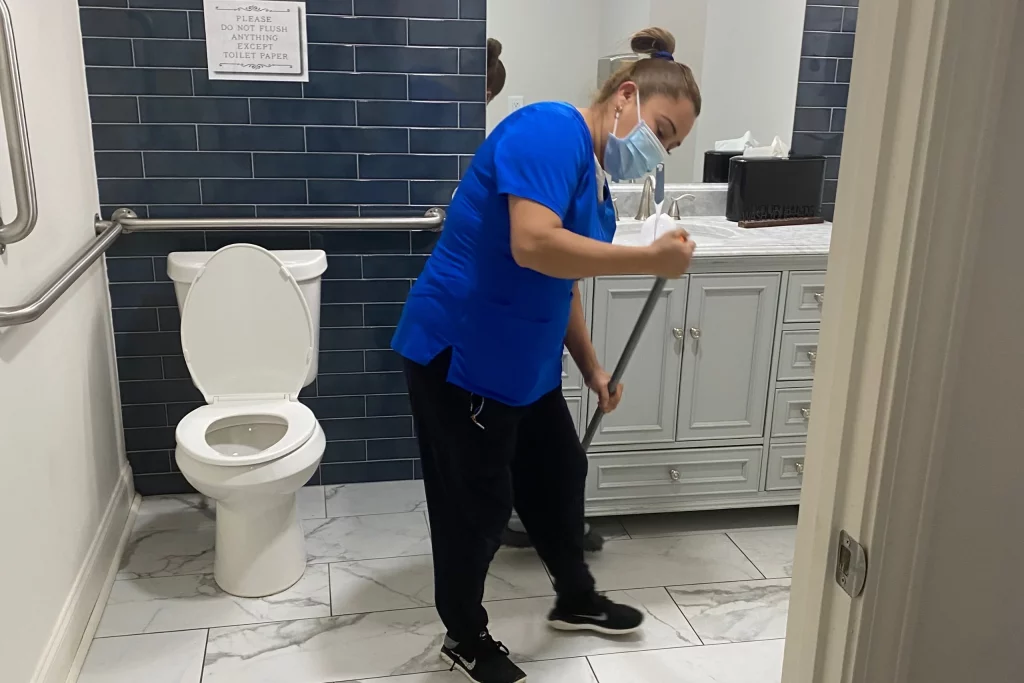


Yes, we might be a bit biased, but that doesn’t make professional cleaning any less important. There are a number of reasons why your office needs a commercial cleaning service, from professional expertise to comprehensive cleaning. If you need help choosing the right cleaning partner, here are two top tips to consider:
Assessing your resolutions regularly is almost as important as coming up with them in the first place. There should be periodic evaluations to review the effectiveness of implemented cleaning resolutions. This allows for timely adjustments based on changing needs or circumstances. Team member insights will also provide valuable information on areas that may need additional attention or improvements in the cleaning routine. And don’t forget to recognize, celebrate, and showcase any cleaning achievement your company achieves, e.g., “ XXX Number of days without a full trash bin,” etc.
The resolutions outlined above form a comprehensive guide to a cleaner, healthier, and more productive office environment. Empower your team by implementing these resolutions and transforming your office into a space that enhances both work and well-being. A clean and organized environment is the foundation for a productive workforce, and together, you all can make this year a benchmark for success.
As you commit to these resolutions, here's to a cleaner, more organized, and incredibly productive year ahead!
Clean Tu Casa is the team to call for any cleaning service in Atlanta. We offer Atlanta residential cleaning services and corporate cleaning services. We provide commercial cleaning services in Marietta, Buckhead, and Brookhaven areas. Whether you want a one-time, weekly, bi-weekly, or monthly cleaning, simply reach out to us for your free quote today.
Time to pack up your trees and decorations. The holiday season is slowly coming to an end. It’s time to start stressing over how best to store Christmas decorations, or are you one of those who just stuff all the decorations into one box and forget about them until next year?
Storing your decorations improperly will lead to clutter and chaos when it is time to bring out the decorations again. You could even damage some of the ornaments. To avoid this, it is essential to store your decorations in a well-organized manner so they can remain in good condition for the next time they will be called into action.
You know we always have your cleaning and organizing concerns at heart. So, here are the best ways to store Christmas decorations.
Option 1: Cardboard Tubes
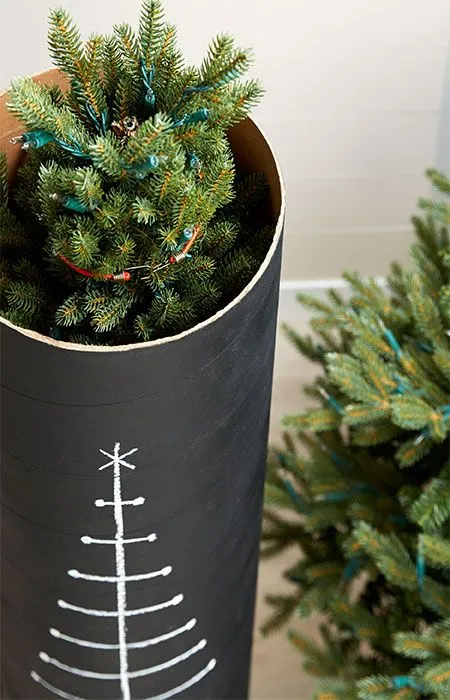
If you want to keep your artificial tree from getting damaged while in storage, consider using cardboard tubes. You can buy two or three 8-inch diameter tubes at any home improvement store. Wrap each layer of the tree in twine and then gently shove it down the tube. You can mark the layer numbers on each tube, so you know which order to put them together when it is time to set up the tree again.
Option 2: Tree Bag or Box
This is another storage option for your artificial tree. These bags or boxes are made from durable materials like canvas or plastic. They come with handles or wheels for easy carrying; some even have compartments for storing tree stands and additional branches. They are effortless to use and available in departmental stores.

Option 1: Color-Coded Bins
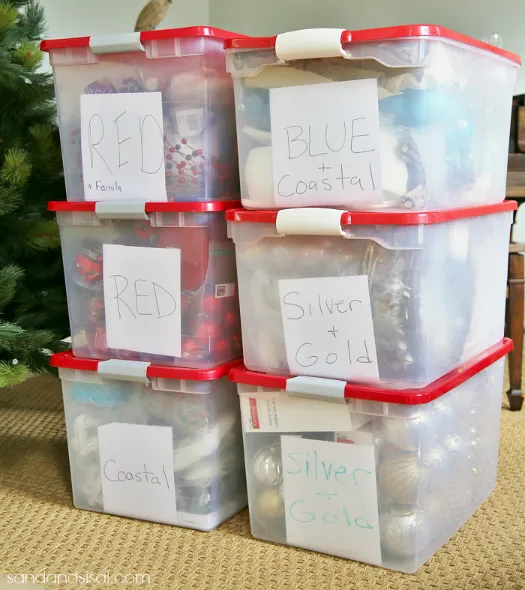
Color-coded bins are a great option if you have ever wondered how to store nonbreakable Christmas ornaments. To keep your ornaments organized and easy to find, you can store them in clear bins after sorting them by color. This sorting process will make it simple to find the right colored ornaments for your tree or garland when it is time to set up again.
Option 2: Ornament Organizer Box
If you prefer a more customized storage solution for your ornaments, One Good Thing By Jillee has the best DIY storage option. You can make your ornament organizer box using plastic cups and a storage bin to create a layered system. Since you’ve probably got loads of plastic cups from the holidays, this is a great way to reuse them and prevent waste. You can cut two pieces of cardboard to size and attach the cups to them using a hot glue gun. Then you will finish by layering the “cup boards” in the bin to keep your ornaments safe and organized.

Option 1: Coat Rack
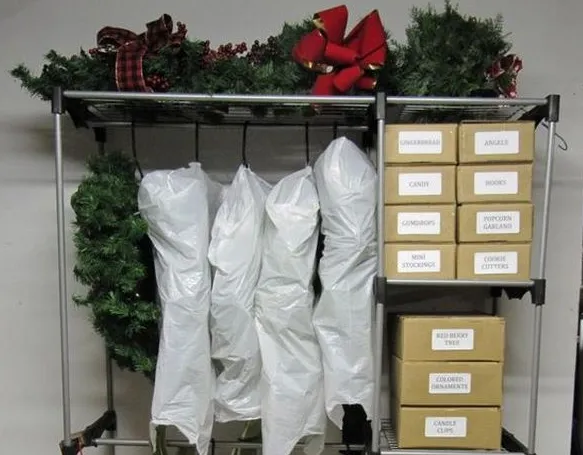
This is a cheap way to store Christmas wreaths. This storage method involves attaching your wreaths to hangers and hanging them on a coat rack. You will then cover each wreath with a plastic bag to protect them from dust. It is really effective for keeping them safe from damage and dust.
Option 2: Wreath Box
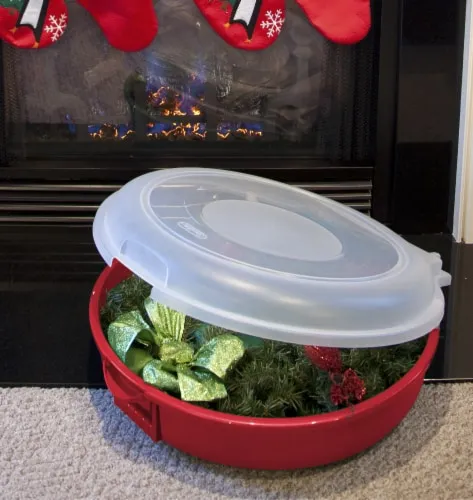
This is the option to go with if you want more protection for your wreaths during storage. These boxes are usually made from plastic and are perfect for wreaths made from dried leaves, flowers, or twigs. They are also great for heavily decorated wreaths. These boxes come in different sizes on Amazon, so you will definitely find the perfect one.
Option 1: Pieces of Cardboard
Probably the most DIY storing option you’ve ever seen, this method makes storing string lights easy. Just wrap the lights around cut pieces of cardboard, then you can store them side by side in a box or bin. You should label each cardboard piece to indicate where you hang that specific string light.

Option 2: Light Spools
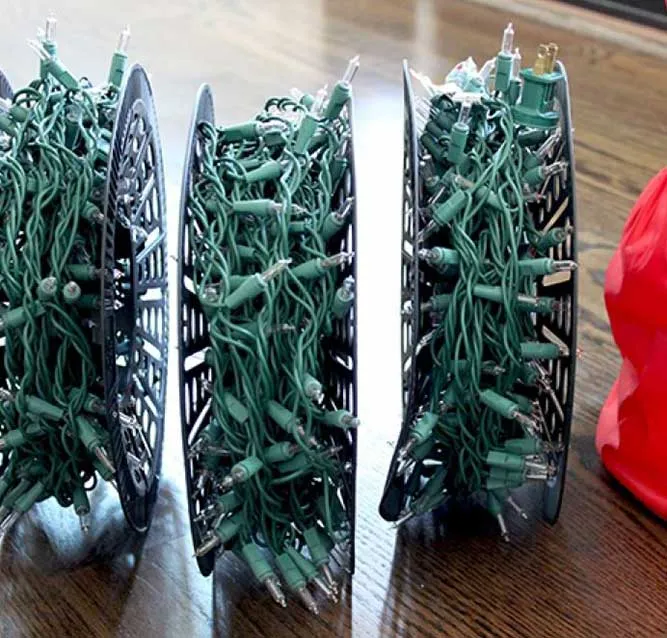
You can use this method to simultaneously hold multiple light strands and keep them from getting tangled. Light spools come in various sizes to accommodate different lengths of string lights. They are also easy to use and involve just wrapping the lights around the spools.
Option 3: Used cans
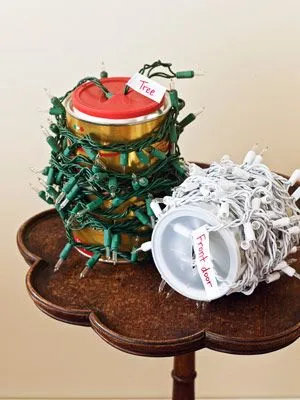
You can wrap the lights around used cans to keep them tangle-free. This method also helps protect the bulbs from breaking. You’ll want to ensure that you untangle the cords first, or else they’ll be challenging to wrap. You can then label and store the cans in a bag or some other dry, cool area of the home. You could also use tissue paper rolls or cardboard tubes in a pinch.
Option 1: Plastic Bins
Plastic bins are an excellent option for storing Christmas decorations, especially outdoor decorations, because they are weather-resistant and durable. The best bins are those with tight-fitting lids to keep out moisture and pests. You can also use plastic bins with dividers to organize Christmas decorations within the bins, so they are easy to find. Your ideal plastic bin should consider the size and weight of your decorations and the amount of space you have for storage.
Option 2: Outdoor Storage Shed
According to Lolly Jane, an outdoor decor shed is ideal for packing Christmas decorations if they are many or if you only have limited space in your garage or basement. Storage sheds can hold large items like inflatable décor, light displays, and holiday figurines. The best sheds should have a sturdy foundation, good ventilation, and a lockable door to protect your decorations from the elements and potential thieves.

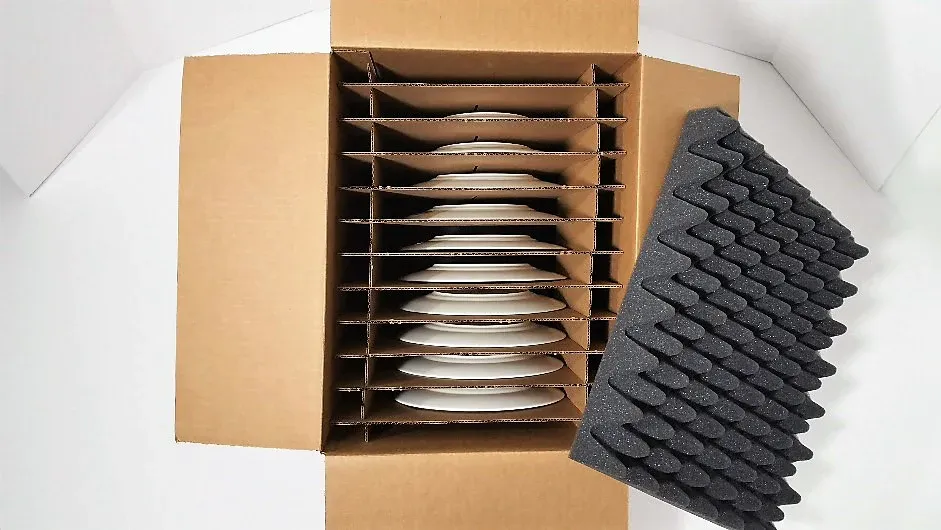
Dish Packs
You can use dish packs for storage if you have unique holiday dishes or other fragile items. The packs are sturdy boxes designed to protect dishes and other breakable items during storage and moving. These packs are a space-efficient storage solution since you can usually fit multiple plates or sets of flatware in each dish pack.
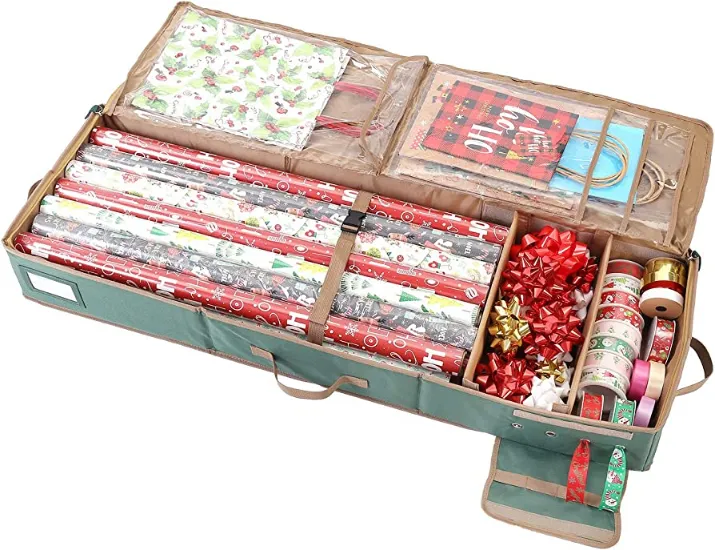
Wrapping Paper Organizer
These organizers are made from plastic or canvas and have compartments or pockets for different wrapping supplies like rolls of wrapping paper, ribbon, and tape. This option ensures that the wrapping supplies are stored in an accessible and attractive manner.
Here are a few tips to generally prepare you for organizing your décor.
This is one of the first things you should do. You should choose a cool, dry place that is out of the reach of pests and the elements. It can be your basement, garage, attic, shelves, wardrobe, or even a combination of these for different decoration materials.
Clear containers can make it very easy to find items that have been stored away for a while. It will also enable you to sort things like ornaments based on color and kind. Tight-fitting lids on these containers mean that dust, pests, and other elements will have difficulty getting in.
Storage bins and boxes are excellent for putting away most of the décor that you want compartmentalized. Outdoor décor and artificial trees can be stored in this without damaging them. Money spent on storage bins and boxes is money well invested.
You will need a lot of labels to be able to categorize all the items you store away. Also, get a small journal to list what you intend to keep and then index the location against the labels you attach to the storage. It sounds all fancy, but it is worth the effort!
Organizing your Christmas décor takes a lot of time and effort. You will need to enlist help from family or friends or get professional help. The effort of many hands will make your work easy and better organized.
Storing Christmas decorations does not need to be a stressful experience. With these tips above, you can always get it done easily and efficiently. You needn’t be concerned about how and where to store Christmas decorations anymore.
At Clean Tu Casa, we not only offer organization tips but also offer organization services. Reach out to us today for your professional home cleaning and organizing services.
The workplace during the holiday season is the definition of festive joy and happiness – from twinkling lights to cubicle ornaments to conference room décor, the air is usually filled with cheer. However, when the holiday fervor wanes, and life returns to that slow pre-festivity grind, all those office holiday decorations will begin to look awkward hanging there. Then, you’ll have to figure out how to clean and store them. But thankfully, we’ve already got that covered for you.
In this comprehensive guide, we will walk you through the process of holiday décor cleaning and office décor storage to ensure a seamless transition back to a sparkling workspace next year.
Related: Best Ways to Store Christmas Decorations

Always start by getting rid of any dust that might have gathered over time on your decor. The best way to handle cubicle ornament dusting is to be delicate and gentle, especially on the more fragile ones. The recommended equipment for dusting the ornaments includes soft brushes or microfiber clothes to avoid causing any damage.
Next is wiping clean. Cubicle decorations come in various materials, each demanding a unique cleaning approach. For wood, you should use a mild wood cleaner to restore its natural luster. An all-purpose cleaner can be used for plastic surfaces. In contrast, a commercial glass cleaner or a combination of white vinegar and some water can be used for glass surfaces. These cleaners should be used with microfiber clothes to prevent streaks.
As you clean, it is essential to disinfect the decorations that are in the high-touch areas of the office and around the work cubicles, like the door handles and knobs or desk edges. Your cleaning efforts must extend beyond aesthetics. Make sure you disinfect cubicle décor as part of the overall hygienic approach to cleaning and promoting a healthier workplace. You can do this by using disinfectant wipes, sprays, or adding disinfectant liquids into some water and then wiping surfaces with it.
Now, let’s focus on cleaning decorations in shared office spaces.
Communal décor cleaning should be done conveniently for everyone in the office. This is why non-allergenic and environmentally safe cleaners are best for health-conscious shared spaces. There are several commercial eco-friendly cleaning products your office can consider getting to maintain a comfortable environment for everyone.
You can encourage a sense of unity among colleagues by coordinating efforts in cleaning shared decorations. Not only does this boost a collaborative spirit, but it also makes the process more efficient and enjoyable. Office décor storing and cleaning up together can be a team-building activity that extends the holiday camaraderie a bit longer.

After cleaning the decorations for your cubicle, you should store them properly to ensure they are available and in good form for next year's festivities. Here are some tips;
Each décor item should be sorted and stored in labeled containers for easy packing and retrieval. This streamlines the storage process and ensures that unpacking next year is a breeze for you, as every item will have its place.
Few things are more annoying than a box of tangled holiday lights. The key to preventing this is to avoid tangling the lights and wires in the first place before packing. Light storage tips begin with using an organizer, cardboard pieces, or a hanger to wrap the lights so they don't tangle and create a nuisance when needed next year. Using these specialized storage solutions will save time and money spent untangling or replacing these lights.
Delicate cubicle ornaments deserve special care during storage. The best way is to use cushioning techniques to protect them from the rigors of moving and storage. You’ve got many options, but the best include using bubble wrap or placing them in individual compartments within storage containers.
Nothing beats an organized and labeled storage area. Clear labels should be used to indicate where the decorations are stored. This efficient storage system ensures easy recognition and retrieval at any time.
By following these essential tips for cleaning and storing office holiday decor, you preserve the life of your decorations and ensure they’ll be there to celebrate many more New Years with you. Collaborate with your colleagues, embrace the spirit of the holidays, and may your office cleanup be joyful and stress-free. Happy Holidays.
Clean Tu Casa is the team to call for any cleaning service in Atlanta. We offer Atlanta residential cleaning services and corporate cleaning services. We provide commercial cleaning services in Marietta, Buckhead, and Brookhaven areas. Whether you want a one-time, weekly, bi-weekly, or monthly cleaning, simply reach out to us for your free quote today.
With the holiday season comes the search for the best gifts for your loved ones. You have to choose the perfect item to place in a holiday gift basket for them, something they’d cherish and use for a long time.
Some of these choices are pretty easy. Your nine-year-old gamer nephew would love that video game that was just released. You also can’t go wrong with a few stylish clothes for your teens. But what about the cleaning enthusiasts?
You know them. Those loved ones that absolutely love ensuring their surroundings are spotless. The ones who delight in the faint smell of freshly cleaned rooms wafting around their well-organized homes.
One great way to go is by assembling a fantastic gift basket. This should contain some items that will delight your duster-wielding loved one. With a holiday basket filled with things that resonate with their cleaning love, you’re acknowledging their passion, which will be appreciated.
This article will show you five must-have items for the perfect holiday basket for cleaning enthusiasts. Let’s get to it:

One terrible aspect of cleaning is dealing with the pungent odors of cleaning products. Many of these products smell too strongly to stand without wearing face masks. Others give a particular disinfectant smell that is far from appealing.
Thankfully, it is possible to break out the heavy-duty cleaning products without leaving your home smelling like a hospital. Aromatic cleaning products that have appealing fragrances are becoming increasingly easy to find. You can put some of those in your holiday basket.
These products are effective yet easy on the skin and nose. Some brands like Safely and Mrs. Meyer have many aromatic cleaning products in their catalogs. Make your choice from their offerings and include them in your holiday basket. Your cleaning enthusiast would love them.
For your loved ones who are enamored with cleaning, it’s not just about keeping the home clean. It also involves organizing all the parts of the house.
A cluttered home is unacceptable to these people, leading them to spend much time putting things in order. However, keeping things orderly in a house with so much stuff can be difficult. Constant cleaning becomes the only option, and it grows stale after a while, even for enthusiasts.
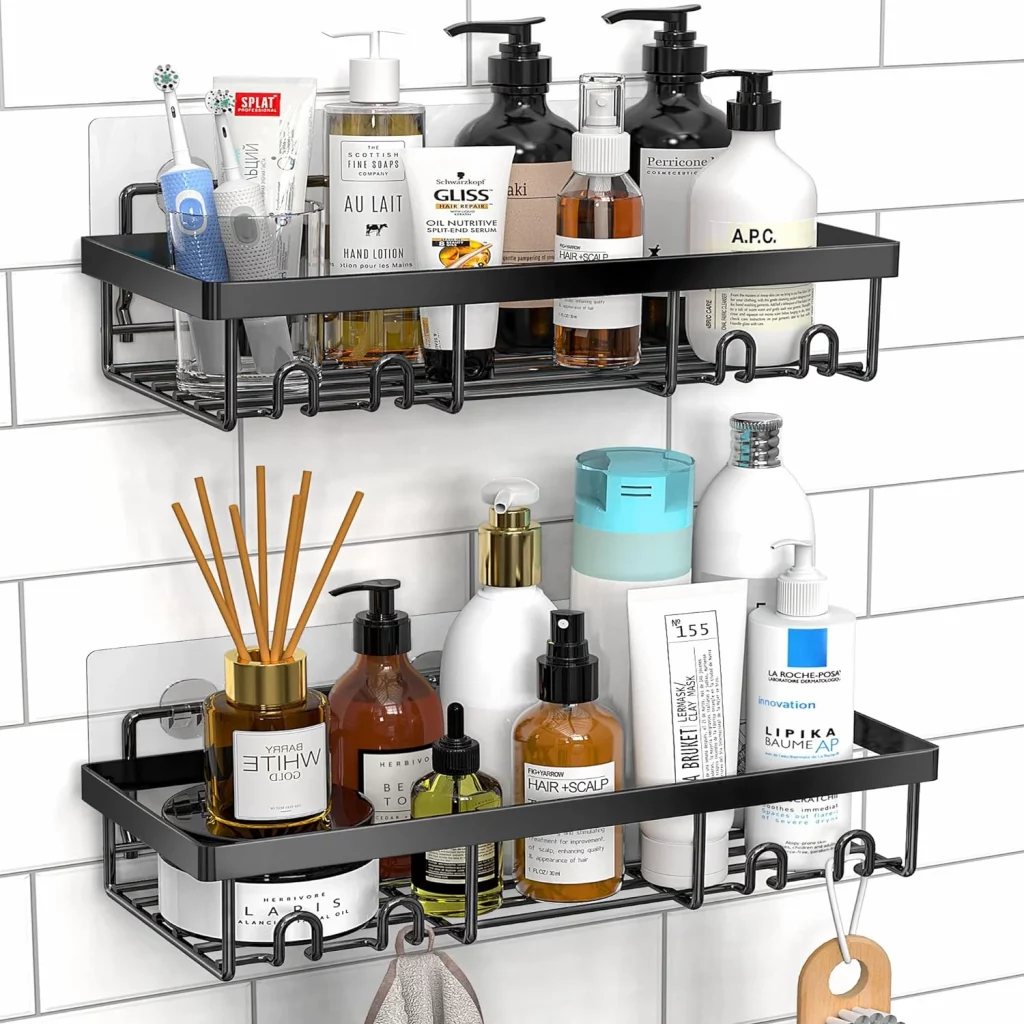
You can include some stylish organization tools in your holiday basket. These could consist of drawer dividers, labeled containers, or, better yet, a shower caddy.
These are large plastic or mesh baskets that are designed to hold beauty products in bathrooms. They could have multiple tiers to contain more items and are usually aesthetically pleasing to beautify the rooms. That’s right: they can also be used in rooms other than bathrooms.
The small-sized ones can be easily contained in a holiday basket, but you can always go for bigger sizes. The organizational benefits of these items are plentiful and would be a lifesaver for any cleaning enthusiast.

The quality of the tools employed in cleaning can determine how enjoyable and easy the work would be. They can transform a mundane, draining task into a quick and easy fix.
These tools are essential items in a cleaning enthusiasts’ arsenal, and there are quite a number of them you can choose from to include in your holiday basket:
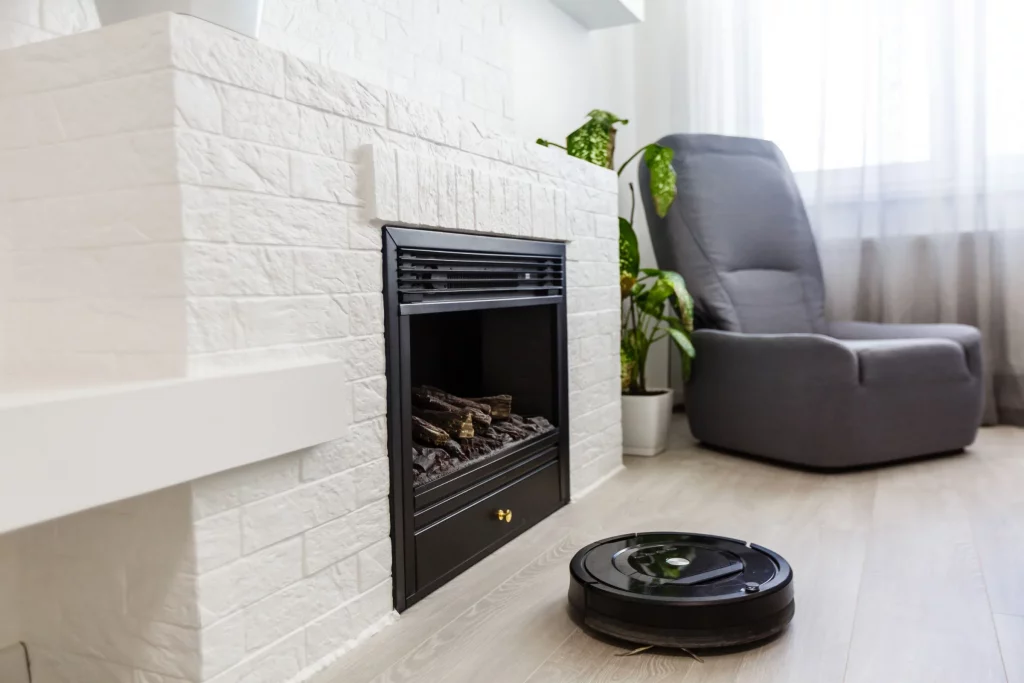
Everyone appreciates a little help with some intricate cleaning chores. This is where cleaning gadgets become essential.
These devices employ technology to simplify cleaning tasks and ease the stress of the cleaner. You can include some of these devices in your holiday basket:
Robotic floor cleaners are portable enough to fit in your holiday basket, so you can consider them.

Your loved one would want to sit back and relax after a long cleaning day. Some self-care products can help with this. You can include items like bath salts, scented candles, or hand lotions to reverse any effects of the cleaning liquids.
It’s nice to remind them that taking care of themselves is just as important as organizing a home.

And finally, the best gift of all is a Clean Tu Casa gift card for a thorough cleaning session in their home or office. As much as they love tidying up, that cleaning enthusiast in your life would likely prefer relaxing while the work is done by someone else. And not just anyone, but a team they can trust to get the job done the way they’ll do it (and even better!)
Identifying The Perfect Holiday Basket Contents For Cleaning Enthusiasts
A holiday basket is a thoughtful way of showing your loved one your appreciation while spreading the love of the season. The gift ideas above are some must-haves if that basket is meant for a cleaning enthusiast.
Ensure to personalize the colors and fragrances of the gifts to align with their preferences. You can also spice up the holiday basket with treats to round off the package. With these six must-have items, you’ll create a thoughtful gift basket that brings joy to their cleaning this holiday season.
Serving Metro Atlanta Georgia
Main office in East Cobb Marietta:
404.382.0470
info@cleantucasa.com
OFFICE HOURS: 8:30am - 5:30pm ET
We currently serve the following areas
of Metro Atlanta, Georgia: